To be able to play a little bit with the new Jenkins Workflow Engine (more about this topic later) I needed to install an additional Jenkins instance on my notebook. But I don’t want to pollute my work environment with temporary installations, e.g. won’t fight with port conflicts and so on.
Therefore I decided to give the “Docker way” a shot instead of doing a traditional installation. Thanks to the official Jenkins Docker image this could be done in seconds (of course depending on your internet bandwith for download).
docker run -d -p 8080:8080 --name=jenkins jenkins
Afterwards Jenkins is up and running and can be accessed via http://<dockerhost>:8080. Concrete value of “dockerhost” is depending on how you installed Docker. Im my case (Mac OS X with Boot2Docker) it “evaluates” to 192.168.59.103.
Unfortunately, the newly installed Jenkins version (at time of writing: Jenkins LTS 1.580.2) doesn’t contain the Workflow-Engine, so there is some work to do.
Easiest way to install it, is using the “Plugins-Maintenance-Center” of Jenkins. Go there and choose the “Workflow: Aggregator” (see picture below) which will download and install all dependencies too.

As promised this way is quiet easy. But in my opinion we need a little bit more automation, which we can achieve by creating an own Docker image, extending the original official Jenkins Docker image with needed plugins.
Fortunately, the inventors of the official Jenkins Docker image prepared a simple mechanism for installing further plugins: A shell script which we have to call with a text file containing the names of the plugins to be installed. The only drawback I found is that automatic dependency resolution doesn’t work in this scenario. Therefore we have to do it manually and provide all direct and indirect needed plugins in this file. Figuring out which plugins are additionally needed is a little bit crazy and annoying but have to be done only once (plugin-pages on Jenkins website like [04] are helpful but didn’t provide full truth) …
As result we get a directory (we will store the exact place as environment variable “JENKINS_DOCKER_DIR” for later use) containing the following two files:
First the “Dockerfile”
FROM jenkins
MAINTAINER Bernd Fischer <bfischer@mindapproach.de>

COPY plugins.txt /usr/share/jenkins/plugins.tx
RUN /usr/local/bin/plugins.sh /usr/share/jenkins/plugins.txt
and second “plugins.txt” containing the list of plugins to be installed
greenballs:1.14
durable-task:1.0
script-security:1.12
git-client:1.11.0
git-server:1.5
workflow-api:1.2
workflow-durable-task-step:1.2
workflow-cps-global-lib:1.2
workflow-scm-step:1.2
workflow-basic-steps:1.2
workflow-cps:1.2
workflow-support:1.2
workflow-step-api:1.2
workflow-job:1.2
workflow-aggregator:1.2
Right, “Greenballs” plugin isn’t necessary for running “Workflows” but I favor green to blue “balls” in Jenkins UI 😉
With this files in place we are able to create our own Docker image
cd $JENKINS_DOCKER_DIR

docker build --tag=”my/jenkins” .
This may take some minutes ….
As soon as it is ready we can create a container and run it
docker run -d -p 8080:8080 --name=my-jenkins my/jenkins
and access Jenkins via http://<dockerhost>:8080.
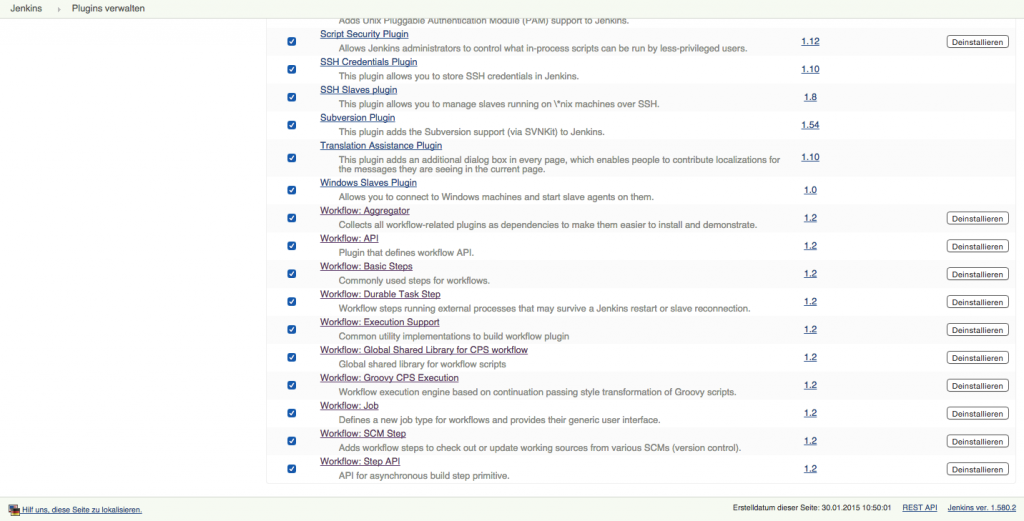
To be sure that all went well we can have a look into the “Plugin-Maintenance-Center” and we should find all plugins we defined in “plugins.txt” in tab “Installed” (see image below shows some of them).
Remark: To use the “docker commands” you need appropriate rights, which means in most cases “root rights”. In some environments you therefore have to prepend command lines with “sudo”.
References and interesting links
[01] Jenkins Workflow Engine – Installation
[02] Official Jenkins Docker image – Repository on GitHub
[03] Official Jenkins Docker image – DockerHub
[04] Jenkins Workflow – Plugin-Page